4.30.2012

Ice cream for breakfast


I'm sorry, I made ice cream again. Strawberry and coconut milk ice cream this time. The strawberries are caramelized in the oven first. The coconut milk is used along with eggs and sugar to make the custard. Everything is put together in the ice cream maker and the result is a source of heavenly pleasure, which finishes freezing in the freezer. This ice cream tastes like strawberry piña colada, like butter and jelly, like strawberries and cream, like summer... Those of you who don't have an ice cream maker and a freezer must be green with envy right now. You have two options:
  • Option 1: Go to the store, buy a pint of Haagen-Dazs and wrongly believe, immerse in the deepest ignorance and living in the darkest dark, that it's as good as homemade ice cream. Pros: it's cheaper, it's faster. Cons: it's really not as good, it makes you fatter, it isn't cool because you didn't do it yourself, and you will be in the dark for the rest of your life.
  • Option 2: Spend a little more and buy an ice cream maker. Make this ice cream. Pros: you will know what heaven is like. Cons: None. Unless you think that having ice cream for breakfast is inappropriate. 
The decision is ultimately yours. And no, I don't sell ice cream makers. I just do this because I care about you guys. Really.


Caramelized strawberry and coconut ice cream
Adapted from Sprouted Kitchen

1lb / 500g strawberries, quartered
2 tbsp sugar
1 pinch of salt

2 egg yolks
1 cup/ 200g sugar
1 13.5 can/ 400 ml coconut milk

Preheat the oven to 300°F / 150°C
Cover a baking sheet with parchment paper. Put the strawberries over it, making a mountain, and sprinkle it with 2 tablespoons of sugar and 1 pinch of salt. Toss to coat and spread the strawberries to form an even layer. Roast in the oven for 25 minutes. Let them cool completely.

In a medium glass bowl beat the egg yolks and the sugar. Put the bowl in a water bath (immerse the bowl in a bigger pot half full of boiling water over the stove) and keep stirring until the sugar dissolves completely. Add the coconut milk and keep stirring until the mixture thickens and covers the spoon. Transfer to a chilled container and refrigerate for 2 hours.

Use the ice cream maker to churn the custard following the manufacturer's instructions. After 3/4 of the churning time has passed, mash the strawberries a little with a fork and add the to the ice cream maker. Let it continue until the end. Pour the ice cream in a chilled container with lid and freeze for a minimum of 2 hours before consuming. 

Congratulations, you have experienced heaven without having to die.

4.26.2012

An ode to the spring


I love the spring. For a number of reasons. First of all because it comes after the winter and I absolutely dislike the winter. My ideal place to live would be a place with no winter at all. No coat, no scarf, no gloves, and overall, no socks. Very few things make me happier than the weather being good enough to not wear socks.

There are many more reasons. Flowers bloom everywhere, the trees grow leaves and everything becomes greener. Being able to read outside, eat outside, and do whatever outside without freezing or melting.

Another big reason is spring seasonal food. I wouldn't say that spring is my favorite season for food, because I really love summer fruit and vegetables. But the spring is the preface of the summer, and it starts giving you some treats to make you forget the dullness of the winter and prepare you for the summer explosion. The spring gives you strawberries, which are a great prize when you have been eating apples and oranges for so long. The spring gives you green onions, leeks, Swiss chard and asparagus. Spring asparagus are just so much better than any other time of the year.

Having written that very corny introduction about flowers and strawberries, I am going to talk about what I made last night for dinner and why. What did I make? I made mushroom and asparagus risotto. Why did I make it? I made it because yesterday I posted a question on my Facebook profile and on Spoonglish Facebook profile asking for suggestions for dinner (If you like spoonglish on facebook, you will see on your feed when there is a new post). I received a number of very delicious ideas. My friend Ana suggested that I made a boletus risotto. Boletus are a type of mushroom that I have never seen at the store here. However, this was my favorite suggestion, so I decided to make it with a different type of mushroom, shiitake. When I got to the store and saw the asparagus I decided to incorporate them to the dish too, so I would have a more seasonal risotto.
I really wanted this dish to be really good, and a very effective way to improve a risotto is to use homemade stock instead of store-bought chicken stock. Then I remembered that I had 2 ham bones in the freezer that I bought when I went to the farmers market (that trip to the farmers market was so productive, I really have to go back). And I was like, "Oh my! A risotto made with a ham stock? That sounds amazing!". So I made the ham stock. It's very easy to make, but it takes a while and you need to have the bones. As an alternative, you could use a couple of chicken drumsticks, and make a chicken broth. And as not-so-great alternative, you can buy store chicken or ham stock and it will be good too (but not as good).


Mushroom and asparagus risotto
Serves 4. Adapted from Gourmet

1lb / 500g green asparagus, cut into 1/2inch(1cm)  slices, leaving tips longer
6 cups / 1 1/2 l  ham stock (see recipe below) or chicken stock
1 tbsp olive oil
4 tbsp butter, divided
1lb/ 500g shiitake (or any other type) mushrooms, clean and cut to 1/4inch(1/2cm)  slices
1/2 onion, chopped
1 1/2 cups/ 300g arborio rice
1/2 cup  / 120 ml white wine
1/2 cup / 30g grated Parmigiano-Reggiano

In a medium sauce pan, bring the stock to a boil and add the asparagus. Cook for 4 minutes, until crisp-tender. Transfer asparagus with a slotted spoon to a large bowl of ice and cold water to stop cooking, then drain and pat dry. Keep the stock simmering on low heat.

In a heavy deep skillet or a 4 quart sauce pan, heat the oil and 1 tablespoon of butter. Add the mushrooms and cook over medium heat for 4 minutes. Season with salt and pepper and transfer to a bowl.

Add 2 tablespoons of butter to the pan and cook the onions, over medium heat, until softened, about 5 minutes. Add the rice and stir for 1 minute. Add the wine and stir for 1 minute, until absorbed. Add one cup of stock to the rice and cook at a strong simmer, stirring, until absorbed. Continue simmering and adding broth, about 1/2 cup at a time, stirring frequently and letting each addition be absorbed before adding next, until rice is just tender and looks creamy, 18 to 20 minutes. Not all the broth needs to be used, just stop adding stock when the rice is cooked.

Remove from heat and stir in remaining 1 tablespoon of butter, cheese, salt and pepper. Gently stir in the asparagus and the mushrooms. Cover and let it sit for 1 minute. Serve immediately and rejoice in the goodness of the spring.


Ham stock

2 2inch wide ham bones
1 leek, white and light green part only, halved
2 carrots, peeled and halved
1 celery stalk
1 garlic clove, peeled

Put all the ingredients in a big pot and cover with 2 quarts (2 liters) of water. Bring to a boil and cook for 1 hour. Strain the stock through a fine colander to get rid of the solids. Let it cool and remove the fat from the surface with a slotted spoon, if necessary.

4.23.2012

For the rainy Sundays


Yesterday was one of those rainy Sundays. You know what I mean, right? You wake up and it is so dark outside that the idea of going out for brunch does not even show up in your brain. However, cooking a nice breakfast that gives you the energy to not go back to bed, that's what a rainy Sunday is about.

I made these pancakes, and then we went shopping. Convincing Scott to go shopping is much more than challenging. I think these pancakes helped. I mean, you can't say no to whom feeds you the most delicious pancakes for breakfast, can you?


These are not regular pancakes. They have ingredients most pancakes don't have, like lemon juice and cream cheese. The baking powder, baking soda and stiff egg whites give them the best spongy and light texture, and the cream cheese chunks that melt in your mouth are just heaven. The original recipe has blueberries, but I was certainly not going to go to the store to get them and they were the only ingredient I didn't have, so I substituted them with strawberries, and I do not regret it.

I halved the recipe because the original says it serves 6 people. However, I only got 6 pancakes, so if you are very hungry I recommend making the whole recipe. It will make about 10-12 pancakes.


This is the best advice I can give you right now: MAKE THESE PANCAKES.

Strawberry and cream cheese pancakes
Adapted from ENunn, best pancake contest winner in FOOD52


1 1/2 cups / 200g flour
1 tbsp / 15g sugar
1 tbsp / 15g baking powder
1/2 tsp  baking soda
1 pinch of salt
2 eggs, whites and yolks separated
1 cup / 235ml buttermilk
6oz / 180g cream cheese, cut into 1/2 inch cubes
1 tbsp melted butter
1 tsp vanilla extract
2 tbsp lemon juice
10 strawberries, thinly sliced
Butter or oil to grease the pan

In a medium bowl, combine the flour, sugar, baking powder, baking soda and salt.

In a separate bowl, whisk the egg yolks and the buttermilk. Add the cream cheese and whisk until the cheese separates into very small lumps. Stir in lemon juice, vanilla extract and melted butter.

Add the dry ingredients to the wet mixture and stir to combine.

Beat the egg whites until stiff peaks form. Fold them gently into the batter.

Heat a griddle or cast iron pan (I used a non-stick) over medium high heat, until a drop of water sizzles. Lower heat to medium; butter or oil pan. Working in batches, drop batter into pan by 1/3 cupfuls. Once the batter has spread, drop in the strawberries. After 2 minutes, or when they have completely puffed, turn them over and cook for another 1 or 2 minutes. Grease the pan before making every batch. Serve with honey or maple syrup or jam.

4.19.2012

Creativity


FOOD52 is a food site that, among other things, organizes weekly recipe contests. For each contest there is a theme (holiday roasts, summer desserts), a main ingredient (pumpkin, eggs ) or a type of dish (risotto, paella, pie). The only rule to participate is that the recipe you send has to be your own. Plagiarism is, of course, not accepted. The coolest thing about it is that the winning recipes are published in their annual cookbook.

So this week's contest theme is alliums. Alliums? I have no idea what that means. OK, let me ask Google. Google shows me the Wikipedia site for alliums. Have I ever told you how much I love Wikipedia? So it turns out that alliums are the family of onions, garlic, chives, shallots and leeks. Shallots and leeks! I love shallots and leeks! I'm going to send something to this contest, and if I don't win, at least I will have invented a recipe with shallots and leeks, and I will be able to eat it.


It's time to be creative my friends. I hate that word, creativity. It's on everybody's mouth right now. Like everyone has to be creative and write it on their resumes. Hey, I'm creative! I'm creating a recipe! Maybe I am the future CEO of Google. Anyway. Let me go back to the recipe.

So what can I make with shallots and leeks without copying the guy that is sitting in front of me?


(I decided to censor the main part of the creative process, just in case you copy me and get to be Google's CEO before I do).

So the result is this leek and shallot quiche. This quiche is more french than any french quiche because it has Dijon mustard and goat cheese, so that makes it super french. I would say it's pretty delicious, but that's just my opinion. You know, mothers always think that their babies are the cuttest.

Maybe it isn't a contest winner. Maybe it is. I'll let you know. Be creative my friends.


Leek and shallot quiche

For the tart shell:

2cups / 250g  flour
1/2 tsp salt
1stick / 8 tbsp / 115g butter cut into pea-size cubes
1 large egg
2 tbsp ice-cold water


For the filling:
4 tbsp olive oil
3 leeks, white and light green parts only, thinly sliced
3 shallots, thinly sliced
1 cup / 230ml heavy cream
3 eggs
1/4 tsp ground nutmeg
1 tbsp Dijon mustard
3/4 cup / 3.5oz / 100 g crumbled goat cheese

To make the tart shell:

Adapted from webos fritos

Preheat the oven to 375°
F / 190°C. 
In a big bowl, mix the flour and salt. Add the butter and mix well (you can use a stand mixer or a wooden spoon or your hands). At this point, the texture will be like coarse sand. Add the egg and keep mixing. Now the dough has to be sticking together a little more. Add 2 tablespoons of cold water, one at a time, and keep mixing. Scrape the dough onto a clean surface and knead a little bit with your hands. Form the dough into a ball and then flatten it to make a thick disk. Cover it with plastic wrap and refrigerate for a minimum of 1 hour.

When you are ready to prebake the shell, take it out of the refrigerator and remove the plastic wrap. On a floured surface, roll the dough until you have a 12inch/ 30 cm circle. Place the dough in a buttered tart pan and press it over the walls of the pan. Using a rolling pin cut excess dough against the tart pan. 

Place a circle of parchment paper over the shell and cover it with pie weights or beans. Bake for 15 minutes, until very lighty golden.

To make the filling:

Preheat the oven to  375°F / 190°C. 
Heat 4 tablespoons of olive oil in a heavy skillet. Add the leeks and the shallots and cook over medium heat for 10 minutes, until very soft. 

In a medium bowl, beat the eggs. Add the heavy cream, nutmeg, mustard, salt and pepper and whisk to blend.

Spread the leeks and shallots over the prebaked tart shell. Pour the cream and egg mixture over, until it reaches the edge of the shell (discard any leftover mixture). Sprinkle the goat cheese crumbs over.

Bake for 35 min, or until the surface is light golden. Let it cool a little bit, cut and serve with green salad. Say Oh la la.

4.16.2012

A disaster and a sorbet


This past weekend was a disaster. I made a brioche, but I didn't bake it for enough time, so it was raw in the middle. I also made bread and I wanted to post it here, as many of you ask me to post bread recipes on my blog. Well, it's going to have to wait because I forgot to add salt to it, and there is nothing worse than a bread without salt. Last night I made one of my favorite family recipes, stuffed zucchini with bechamel sauce. They were delicious but I forgot to take pictures. As you can see, a total disaster. There is only one thing I didn't fail at, and that is this beautiful raspberry sorbet.

Rachel gave me an ice cream maker for my birthday. Yes, that is right, an ICE CREAM MAKER! Are you jealous? So this was my first attempt to make ice cream, just when the weather was asking for it. It's not OK for me to say that it was really good, so I won't say it. Just imagine it yourselves!


A few tips on the recipe. I made it with frozen raspberries because they cost half as much as fresh raspberries. Also that reduces the time they need to chill before putting them in the ice cream maker, as they are already pretty cold after thawed. When I put them in the blender, I added the water too as the blender wasn't working with just the raspberries.
I made the simple syrup with light corn syrup. Using corn syrup or glucose prevents the water from crystallizing in the freezer, giving the sorbet a better texture. Other recipes only use sugar and water, so I guess you can try without the corn syrup if you can't find it (in Spain it is hard to find). 


Raspberry Sorbet
(from The Professional Pastry Chef)

For the simple syrup:
400 ml/ 13.5 fl oz water
240g /  8.5oz sugar
140g / 5oz light corn syrup or glocuse

For the sorbet:
1lb / 500g  raspberries
2cups/ 480 ml water
The juice of 1/2 lemon
2 cups/ 480 ml simple syrup

To make the simple syrup:
Stir the water, sugar and glucose or corn syrup in a saucepan. Bring to a boil and let it boil for a few seconds. Remove from heat. Let it cool thoroughly. 

To make the sorbet:
Use a food processor or an electric blender to liquify the raspberries. Strain to get rid of the seeds. Combine the raspberry juice, simple syrup, water and lemon juice in a bowl. Refrigerate until the mixture is cold.
Process in an ice cream maker following the manufacturer instructions. When finished, transfer to a chilled container and store in the freezer for a couple hours before serving.

4.13.2012

About fish, shellfish and other sea creatures


Squeamish people, people disgusted by seafood and other weird nature creatures, you can stop reading now. For the rest of you, the cool people, I have seafood today.

Washington is near the coast and has a pretty big seafood tradition. In fact, there is a fish market that I have never been to (note to self: go the the fish market) and most restaurants have seafood in their menu. The most typical seafood products in restaurants are mussels, scallops, shrimp, tuna and salmon. The fish sections at the grocery stores have more things. Besides shellfish, tuna and salmon, you can also find tilapia, mahi-mahi, haddock, cod, halibut, flounder... These types of fish are very different from the ones found in Spain's fish stores. Another big difference between American and Spanish fish stores is that while here the fish is exposed clean, headless, boneless and even skinless, in Spain you normally have the whole fish and when you choose one, they prepare it for you the way you want it.

Every time I go to the store, I slowly approach the seafood section and look at what they have. However, the dry look of the fish and the lack of professionalism of the people that work there usually make me go away.

I wanted to make this seafood stew for a long time and it was the perfect opportunity to use my new beautiful red dutch oven that Scott got me for my birthday. Cioppino is a San Francisco fisherman stew, and as a big fan of seafood soups, I couldn't wait to make it. And I loved it!


In the recipe, you can also find how to make the seafood broth. You can also buy it at the store, but I recommend you to make it as it's really easy and your Cioppino will be so much better. Why don't you make it? It is really easy!


Cioppino (California seafood stew)
(For 6 people or so)

For the seafood stock
The heads and shells of the shrimp (1 lb,1/2 kg)
A fish bone (optional)

For the stew
1 fennel bulb
1/2 onion
1 leek
3 garlic cloves
1 bay leave
1 tsp oregano
1/4 tsp paprika
1 28oz/ 800g can of whole peeled tomatoes
1 cup / 230ml white wine
2 1/2 cups / 600ml seafood stock
1lb / 1/2kg shrimp, heads and shells removed (used for the stock)
1lb / 1/2kg halibut, haddock or other white fish, skinless, cut in bite size pieces
1lb / 1/2kg mussels with shell, scrubbed, debearded
1lb / 1/2kg squid, cut in bite size pieces

Seafood stock
In a medium saucepan heat 3 tbsp olive oil. Add the shrimp shells and heads and sear them for 2 minutes over medium heat. Add the fish bone (if you have it) and 3 cups of water. Bring to a boil, lower the heat and let it cook for 5 minutes. Remove from heat and pour it through a mesh strainer over a pitcher or a big bowl. Press the solids over the strainer to let all the juices out. Discard solids.

Cioppino stew
Finely shop the fennel, onion, white part of leek and garlic. In a big pot heat 4 tbsp of olive oil and add the fennel, onion, leek, garlic, bay leave, oregano, paprika, salt and pepper. Cook over medium heat for 15 minutes, stirring ocassionaly.

Chop the tomatoes or crush them with your hands, discarding the juices. Add tomatoes, white wine and 2 1/2 cups of seafood stock to pot. Bring to a boil. Lower the heat, cover and let it simmer for 15 minutes. Taste and add more salt if necessary.

Add shrimp, mussels and fish. Cover and let simmer for 2 minutes. Add squid, cover and cook 5 more minutes, until the fish is done and the mussels have opened.

4.11.2012

Strawberry tart


Last week was a one of those weeks full of huge meals followed by strong regret and inevitable weight gain. That, my friends, makes it an awesome week. The week after, however, is the week that isn't so great, as you want to go back to your normal calorie consumption rate and you can't. Also, having a huge bucket of Easter candy sitting on your work desk doesn't help.

The reason for that Christmas-like week was a birthday dinner on Thursday, and Easter Sunday lunch, both at Scott's parents house. These huge two delicious meals, with appetizers, several entrees and two desserts each (with an Easter-egg hunt included in one of them) are a good example of how Lisa and Gary like to do holiday meals. But if this description wasn't enough for you, you can see it with your own eyes.


I know, they look amazing, right?  I can tell you they tasted amazing too. One day I will make cakes like those, but for the time being I am going to show you a much simpler cake I made yesterday.

In this craving for even more food that last week left me with, I decided to make a dessert myself. My only requirement was that it had to have fruit on it. After finding and bookmarking several blueberry pies, raspberry cobblers and apple tarts (that I will have to make in the future) I decided to make this strawberry tart because we are on strawberry season and they cost half as much as blueberries or raspberries.

What I liked the most about making this cake was to make the pastry cream (which is pretty much all for this cake). I had never made pastry cream before and I was very surprised about how fast it goes from being liquid to being thick. It was also the first time I used vanilla beans and I love how the flavor is so much better than that of vanilla extract.


Strawberry tart
(Adapted from smitten kitchen)

For the pastry cream:
1 1/4 cups / 300g whole milk
1/2  vanilla bean, split and scraped
3 egg yolks
1/2 cup / 100g sugar
3 tbsp/ 30g cornstarch
3 tbsp butter, at room temperature

For the crust:
A 9.5 inch circle of pie crust

For the strawberries:
About 20 strawberries
1/2 cup sugar
The juice of a lemon

Pastry cream (make 4 hours ahead):
In a small saucepan heat the milk with the vanilla pod and pulp. Bring to a boil. Cover, remove from heat and let it stand for 10 minutes. Discard the vanilla pod.
In a medium saucepan whisk the egg yolks, sugar and cornstarch. Slowly add the milk while whisking, until  well incorporated. Put the pan over medium heat and whisk constantly until it boils. you will see how the cream suddenly thickens. Keep stirring for another 30 seconds and remove from heat.
Scrape the cream into a bowl and let it cool for 3 minutes. Cut the butter into little pieces and stir them into the cream until blended. Cover the bowl with plastic wrap pressing it onto the surface of the cream to make an airtight seal.
Refrigerate for 3 hours. Remove from heat 30 minutes before final arrangement.

Pie Crust (make 1 hour ahead)
Make our buy a pie crust. I keep failing at trying to make a nice pie crust. I know it's easier if you have a food processor. I don't have one so I used a store bought pie crust that i had in the freezer. If you are going to make it, let one more hour for cooling the dough in the refrigerator.
Unroll the dough circle over a tart pan. Bake it following the instructions on the package or the recipe. Let it cool completely at room temperature.

Strawberries (make 20 minutes ahead):
Remove the leaves and any non-red parts from the strawberries, rinse them and cut them in halves. Place them in a bowl.
In a pan stir the lemon juice and the sugar and bring to a boil. Remove from heat and let it cool for a couple of minutes. Pour the syrup over the strawberries and toss to coat.

Final arrangement:
Remove the cream from the fridge and let it stand for 20 minutes. Spread the cream over the crust. Arrange the strawberries on top forming concentric circles.

Eat (make 0 minutes ahead): 
Cut, eat, smile.

4.06.2012

My favorite kind of people

I like people who love to eat. Those people who eat something and they love it and then can't stop talking about it, making almost-obscene sounds thinking of how good it was. Those people who always have seconds of everything, people who wipe the plate with bread until it's clean.  I like people who will eat anything. People who first try it and then ask what it is. I like people who think that eating is one of the biggest pleasures in life. I really like them, I can't help it.

I do like myself in that sense too. I like that I like eating. I like it so much that I got really worried some months ago when suddenly I lost my appetite for several days. I thought that if I didn't want to eat anymore I wasn't going to be the same person. Thank goodness that it came back!

My family on my mom's side is the same way. They all eat a lot and they are all great cooks. In family reunions food is always the main conversation topic. Lots of recipes are exchanged, and most importantly, we eat a lot and very well. My family are definitely great people.


Today I have a recipe for that kind of people. Braised pork cheeks. The obscene sounds are guaranteed. The sauce is the kind that makes you want to lick the plate (don't worry mom, I haven't licked the plate). Although it might sound weird to you, this is a very typical dish in Spain. Here in America one doesn't often find pork cheeks at the supermarket, but, oh my friends! My recently discovered farmers market has a stand with all kinds of meet cuts, and the pork cheeks are super cheap.


I made them the day before, as I have learnt that this kind of dishes taste much better after a night resting in the fridge. I served them with homemade potato fries. I read somewhere that the best fries are fried in two steps. First you fry them in oil that is not very hot for some minutes. Then you take them out and let them cool down, and then you fry them again in very hot oil so they get crispy on the outside. I did it that way, and I am not sure if it was worth it, but they were good.


Braised Pork Cheeks in Red Wine Sauce
(Serves 2. For more people, add more cheeks)

8 pork cheeks
5 tbsp olive oil
1 onion
2 celery stalks
3 carrots
1 garlic clove
4 plum tomatoes (or a can of whole tomatoes)
1.5 cups/ 350ml/ (more or less) 1/2 bottle of red wine
1 cup/ 250ml of beef stock
1/2 tsp dry thyme
1/2 tsp dry rosemary

Preheat the oven to 350º F/180ºC

Pat-dry the cheeks and season them with salt and pepper. In a big heavy pot (with a fitting lid) heat the oil and sear the cheeks in batches, 3 minutes on each side, until golden brown. Take them out to a plate and reserve.

Coarsely chop the vegetables. Add the carrots, onion and celery to the pot and stir over medium heat. Add minced garlic and let it cook for some minutes. Add the wine and bring to a boil. Then add the stock, the tomatoes and the spices and the pork cheeks with their juices and bring to a boil.

Cover the put and put it in the oven for 2 1/2 hours, or until the meat is tender. While it's in the oven, check often if it is simmering. If it is not, turn up the heat, and if its boiling, turn it down. Another option is to braise it over the stove, where it is easier to control the simmering, but I prefer the oven as the heat distributes evenly.

When it's done, take out of the oven and let it cool. Now you can put it in the fridge until the next day or you can keep going. I did the former.

Take the cheeks out of the pot (if they are cold from the fridge, heat them first over medium heat so the sauce liquefies). With a blender, puree the sauce until smooth. Add more salt to the sauce if necessary and bring to a boil. Lower the heat, add the cheeks back to the pot and simmer for 10 minutes.

Serve, eat, make obscene sounds, wipe your plate with bread, lick your fingers.

4.05.2012

Tarte Tatin


Who knows why some upside-down cakes are call Tatin? I do.  "Of course she does", would my old classmates say. I was the girl in the class who always raised her hand to answer every question. Some people hated me for that, whatever...

Anyway, back to the tart. La Tarte Tatin gets its name from the restaurant Hotel Tatin, in France, where it was created and became their signature dessert in the 1880s. The legend says that one of the sisters who owned the restaurant was making an apple pie but she overcooked the apples. Smelling the burning, she tried to rescue the dish by putting the pastry base on top of the pan of apples, quickly finishing the cooking by putting the whole pan in the oven. This is a perfect example of how most of the greatest discoveries happen accidentally.

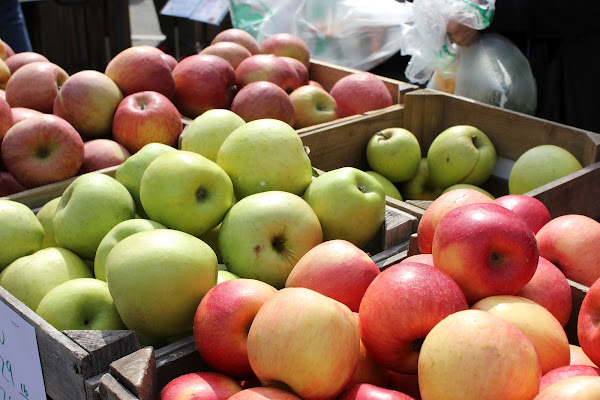
I had this recipe for Tarte Tatin sitting in my email in-box for a while. The sender, my mom, has been making it pretty often recently because it's a big success in my family. Last Saturday, when I went to the farmers market and I saw these delicious apples, I realized that the time to make the tart had arrived.


When making a new dish, and even more when it is a popular one, I try to compare as many recipes as I can find. Doing this, I realized that most recipes for Tarte Tatin tell you to cook the apples before putting the tart in the oven. However, my mom's recipe didn't. This is great because I don't want to give you a recipe that you can find in every single cooking site.

I made it last night. I used this pan because it is ovenproof. If you don't have an ovenproof pan or a stove-proof cake pan, you can make the caramel in a regular pan and then transfer it to a cake pan before adding the apples. I am sure it will work.

The result was spectacular. BIG THANKS MOM! This is just awesome! Scott got mad at me because I didn't let him try it until I was done taking pictures of it, and it took me a while. He loved it, we both had two pieces and then I had another one for breakfast this morning.

As you can guess from these pictures, I haven't given up editing after getting the new camera. However, only a few white balance and contrast adjustments got me the picture below. Isn't it pretty?  I think I am going to eat the last piece.


Tarte Tatin

5 apples
1/2 cup/ 100 g sugar
The juice of an orange
1/2 stick/ 50 g butter
1 sheet of puff pastry

Preheat the oven at 180º C/ 350º F. 

Peel, core, and cut the apples into wedges. In a deep ovenproof skillet, melt the butter and add the orange juice and the sugar to make a liquid syrup. Arrange the apple wedges in the pan, rounded side down, trying to make packed concentric circles (I wasn't very successful at this). 

Use a rolling pin (or a wine bottle ) to roll the pastry sheet into a big square and cut it into a circle big enough to cover the apples. Lay the pastry over the apples and stab it with a fork several times so the air can scape in the oven. Bake in preheated oven for 45 minutes. 

Take it out of the oven and let it rest for 5 minutes. Then turn the pan upside-down onto a plate. Enjoy warm with some vanilla ice cream or  some cream.

4.03.2012

For those lazy days

There are some days that you wake up and the only thing you want to do is go back to bed, or lie down on the couch. This happens to me on days when I have to do something I hate, like cleaning. Usually I postpone it while I watch TV or read my favorite blogs until it is super late in the afternoon and I haven't started. Call me lazy, if you wish. Obviously, no one wants to go out to go to the supermarket on this kind of day. First of all, because there is no way you are going to take off your pajamas, and second, because you haven't washed your hair in three days and are afraid that you will come across someone you know. The laziness is so big that you almost don't eat, maybe just snack a little bit. At dinner time, you are so hungry that you would eat a truck full of cows. This is when you decide that it was enough. Now it's time to move your butt or you will get stuck and have to live in the couch for the rest of your life (although it wouldn't be that bad). So you decide to go to the kitchen and see what you can make for dinner.

If this happens to you, dear friends, I have the solution (as long as you have the ingredients). It is great for hungry ones. It is a calorie-bomb that gives you bursts of satisfaction at every bite. A recipe easy enough for the very beginners and fast enough for the laziest day. This is my personal fast food: spaghetti carbonara.

To make it you only need bacon, onion, one egg and spaghetti (or any other type of pasta). Now is when you might disagree and say that you prefer to add cheese, or mushrooms, or who-knows-what . No. This is my blog, dear friends, and these are my spaghetti carbonara. Please trust me, they are exquisite.


Spaghetti Carbonara
For 2 hungry souls 

1/2lb/ 250g spaghetti
1 cup/ 250ml heavy cream
1 onion, finely chopped
7 slices (or more) of bacon, cut in 1/2-inch wide pieces

Heat 2 tbsp of olive oil in a large skillet. Add the onion and cook over medium heat for about 1 minute, until a bit softened. Add the bacon and cook for another 5 minutes. Add the cream. Bring to a boil. Season with salt and pepper.

Cook the pasta in a pot following the instructions on the package. Strain it (do not rinse it!) and put it back in the pot. Pour the sauce over it. Add the raw egg and stir very well (the egg cooks with the heat from the pasta and the sauce). Serve immediately. Go back to the couch to eat them.


4.01.2012

Holy jetlag


I never thought of being jetlagged as something positive. Usually when I am jetlagged I wake up very early in the morning and get tired very early at night. That makes me angry. However, this time I decided to take advantage of it, and I succeeded. Everyday this week I either worked out or wrote on spoonglish before going to work in the morning, and it was so satisfying. Although now that I think about it, maybe it has to do with the fact that I turned 26 last week and I am becoming an old morning person.

 Yesterday it was Saturday and I was awake early too, even though I went to bed at 3am on Friday night. For the first time ever, being awake at 8am on a Saturday was perfect. Why? For so many reasons: 1) Because the night before my brand new camera arrived and I couldn't wait to learn how to use it. 2) Because I had always wanted to go to the farmers market but they only open on Saturdays from 9 to 12, so I could never go because I was always asleep. 3) Because both things added up so well! I could go to the farmers market, buy food and take pictures of the market!

So I got up and started to read the huge instruction book of my brand new camera. At 10 am I had taken 143 pictures of my coffee mug and 87 pictures of a beer bottle, using all the possible different settings. It was time to head to the market.

 It was a beautiful morning. I was surprised of seeing so many people on the street. Not only old people but also young people. Everyone at the market was so nice. The farmers let me take pictures of the food and told me things about their farms and their products. Everything was extremely expensive (I paid 8 dollars for a loaf of bread and 5 dollars for a lettuce), but the quality is excellent and you are getting the freshest products straight from the farm.

My favorite stand was the bread stand. I couldn't stop taking pictures. They had so many kinds of breads, all hand made, with different flours and flavors. It took me a while to decide which one to buy. In the end, I chose a barley and wheat loaf that had many different types of seeds. It was delicious.


Seeing all that food at the market made me want to get in the kitchen and cook something. So I did it. I hadn't made bread for quite a long time, so I made dough for a ciabatta and put it in the refrigerator. I will talk about this ciabatta and making bread in a different post because I haven't baked it yet, and because bread baking is a whole different world that deserves its own post. I also made pavo en escabeche (pickled turkey breast) which made the kitchen very stinky. I can't post about that either because I haven't tried it, as it has to stay in the fridge for 3 more days before eating it. But don't panic, there is a recipe that I can talk about and I am proud to say that I made it up myself and it turned out very good. It is a delicious cauliflower soup! I made it because I couldn't wait to use my new yellow hand blender (thanks mama). Here it is:


Cauliflower Soup

1 cauliflower
1 onion
1 big potato or 2 small potatoes
3 cups/750 ml chicken stock
1/2 cup/120ml heavy cream
1 pinch grated nutmeg
3 tbsp olive oil

In a big pot, heat the olive oil and add the onion coarsely chopped. Cook over medium heat for 5 minutes until soft. Meanwhile, coarsely chop the potatoes and the cauliflower. Add them to the pot and stir for a couple minutes. Add the chicken stock and water to cover all the vegetables. Increase the heat and bring to a boil. Lower the heat and simmer for 20 minutes, until the cauliflower is soft. Using a blender, puree the vegetables until a smooth texture is reached, with no lumps. Add the cream, the nutmeg, season with salt and pepper and stir well. Serve in bowls and decorate with some ground nutmeg.